How to soundproof your basement for quiet, luxury living
TL;DR:
- Effective basement soundproofing requires a layered system targeting multiple sound transmission paths.
- Moisture control and radon testing are essential prior to installing acoustic materials.
- Proper planning, high-quality materials, and sealing all gaps ensure a truly quiet and luxurious space.
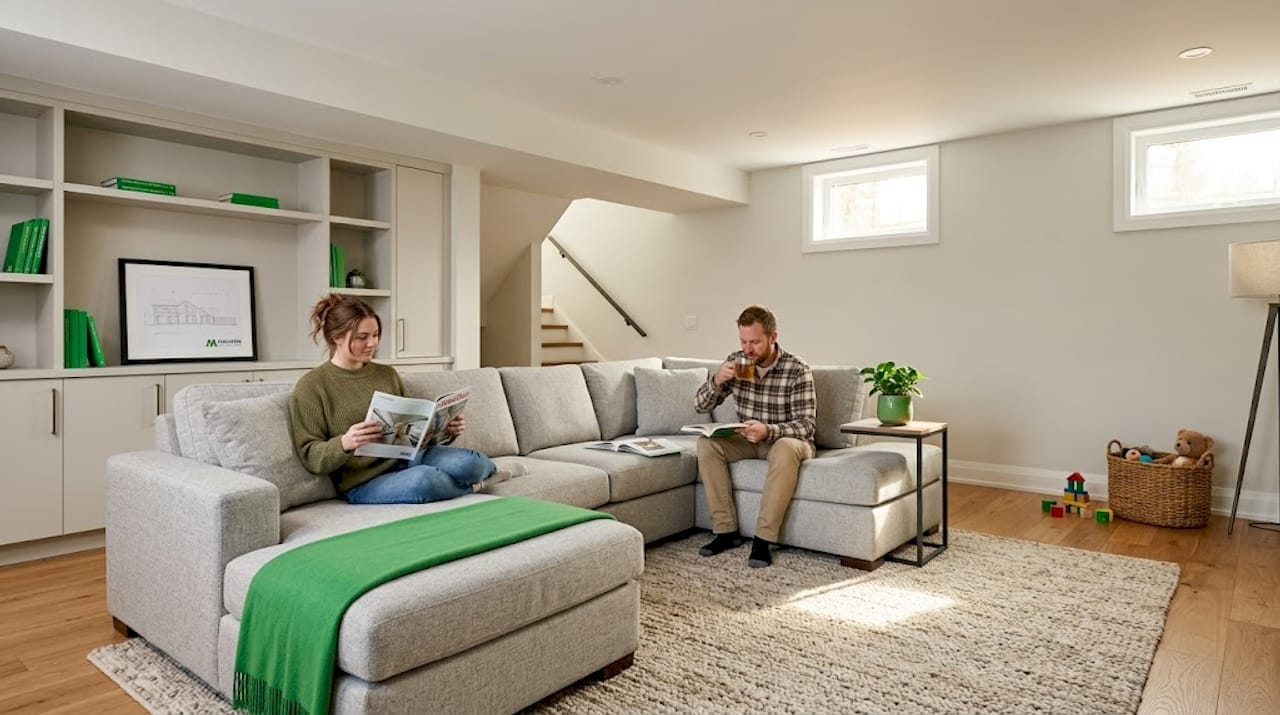
You’ve invested in premium finishes, custom lighting, and high-end flooring for your basement retreat. Then someone walks across the kitchen above, and the whole room fills with the dull thud of footsteps. It’s a familiar frustration for South Georgian Bay homeowners who’ve spent serious money on below-grade living spaces only to have their comfort stolen by noise. Soundproofing a basement the right way isn’t just about adding insulation. It’s about understanding how sound travels, choosing the correct materials, and executing a layered system that genuinely delivers the quiet you paid for.
Table of Contents
- Understanding basement soundproofing: Myths, facts, and core concepts
- Prepping your basement: Moisture, safety, and the right foundation
- Step-by-step: Building a soundproof basement from ceiling to floor
- Testing and fine-tuning: Did your soundproofing actually work?
- What most people miss about basement soundproofing
- Ready to enjoy your perfect, peaceful basement?
- Frequently asked questions
Key Takeaways
Point
Details
Soundproofing vs treatment
True soundproofing blocks noise transmission, not just echo control within your basement.
Start with prep
Correct moisture and radon issues before adding insulation or drywall to ensure lasting results.
Ceilings are critical
The ceiling is the main sound path—use isolation assemblies and quality materials for biggest noise reduction.
Test your success
Verify your improvements with practical testing, aiming for an STC 50-55 rating in upscale basements.
Understanding basement soundproofing: Myths, facts, and core concepts
Soundproofing and acoustic treatment are not the same thing, and mixing them up is the most expensive mistake you can make. Soundproofing blocks transmission using mass and decoupling, while acoustic treatment absorbs echoes inside the room using panels or foam. Foam does not soundproof. It never has. If someone is selling you a quiet basement on the back of foam panels alone, walk away.
Basements are particularly challenging because they sit directly below the main living areas of your home. Every footstep, dropped item, or conversation from the floor above travels through the joists and subfloor with almost no resistance. The structural path is direct and efficient, which means noise reduction requires attacking multiple transmission routes at once.
For truly luxurious results, you’re targeting an STC (Sound Transmission Class) rating of 50 to 55. STC is the industry standard measurement for how well a building assembly blocks airborne sound. Full soundproofing systems achieve 50 to 80 percent noise reduction, and mineral wool insulation significantly outperforms fibreglass, with STC ratings of 45 to 52 versus 39 to 44 for fibreglass. These numbers matter when you’re planning a home theatre, music room, or premium guest suite.
Thinking about enhancing basement comfort goes hand in hand with soundproofing. The two goals reinforce each other when planned together from the start.
Common soundproofing myths debunked:
- Foam panels stop outside noise entering a room. False. They only reduce internal echo.
- Standard batt insulation is good enough. Partially true for thermal performance, not adequate for STC targets above 40.
- Sealing gaps isn’t that important. Wrong. A single unsealed electrical box can reduce your STC by 10 or more points.
- Thicker drywall alone solves the problem. Thickness without decoupling barely moves the needle.
STC rating
What you hear
25 to 30
Normal speech clearly audible
35 to 40
Loud speech audible, words unclear
45 to 50
Loud speech mostly muffled
50 to 55
Only very loud sounds faintly audible
60+
Near silence in most conditions
Luxury basements need to sit comfortably in that 50 to 55 range, and getting there requires a complete system, not one clever product. Understanding the benefits of basement finishing reinforces why this investment pays off well beyond just noise reduction.
Prepping your basement: Moisture, safety, and the right foundation
No soundproofing system performs well in a wet basement. Moisture destroys insulation, promotes mould growth, and undermines structural integrity. Before a single acoustic product goes in, you need to confirm your basement is dry and safe.
The plastic sheet test is your first move. Tape a 60-centimetre square of plastic sheeting flat against the concrete wall or floor and seal all four edges with tape. Leave it for 48 to 72 hours. Moisture collecting on the outside of the sheet means humidity is the issue. Moisture underneath means you have vapour intrusion through the slab, and you need interior drainage or membrane solutions before any insulation goes up. Damp insulation loses all thermal and acoustic effectiveness.
Once moisture is under control, radon testing is non-negotiable. Updated 2026 codes require radon testing in basements before completion of soundproofing or enclosing walls. Radon is a naturally occurring radioactive gas that accumulates in below-grade spaces. It’s odourless and invisible, and it’s a serious health concern in parts of Ontario including portions of Simcoe County.
Pro Tip: Order a Health Canada approved long-term radon test kit and place it in the lowest occupied area of your basement for 90 days before beginning any enclosure work. It’s inexpensive and gives you the most accurate reading.
Here are the essential prep steps in the correct order:
- Conduct a plastic sheet moisture test on walls and floor
- Address any hydrostatic pressure or active water infiltration with interior drainage
- Apply a waterproof membrane or dimple mat to concrete surfaces as needed
- Test for radon and mitigate if levels exceed 200 Bq/m³
- Inspect joists and subfloor above for rot, gaps, or structural issues
- Identify all plumbing, electrical, and HVAC penetrations that will need acoustic sealing
- Confirm ceiling height to determine which decoupling method suits your space
Low ceilings are a particular challenge in older South Georgian Bay homes. When ceiling height is a concern, resilient sound isolation clips are a better choice than full resilient channels because clips allow a tighter assembly with less lost height. The steps for successful basement finishing walk through these considerations in detail and are worth reviewing before you commit to a design.
For material selection, mould-resistant mineral wool batts are the preferred choice in high-humidity basement climates. They outperform fibreglass on both acoustic and moisture-resistance fronts, and they don’t require a face mask to handle during installation.
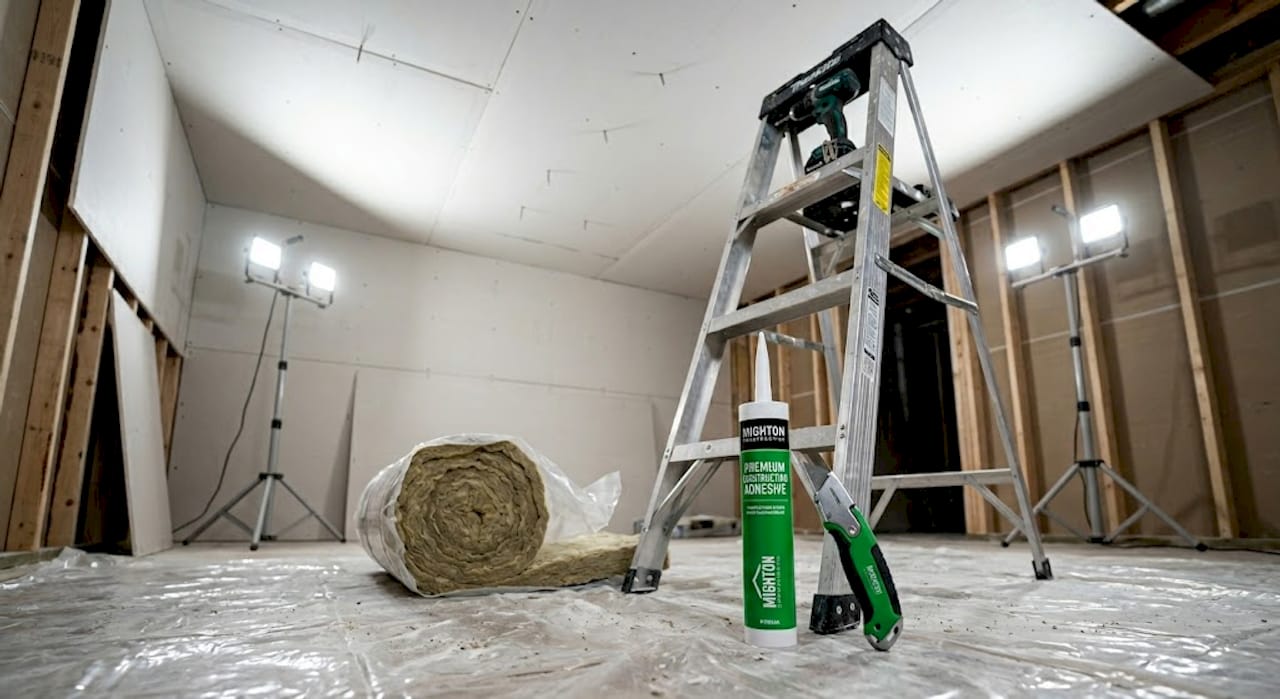
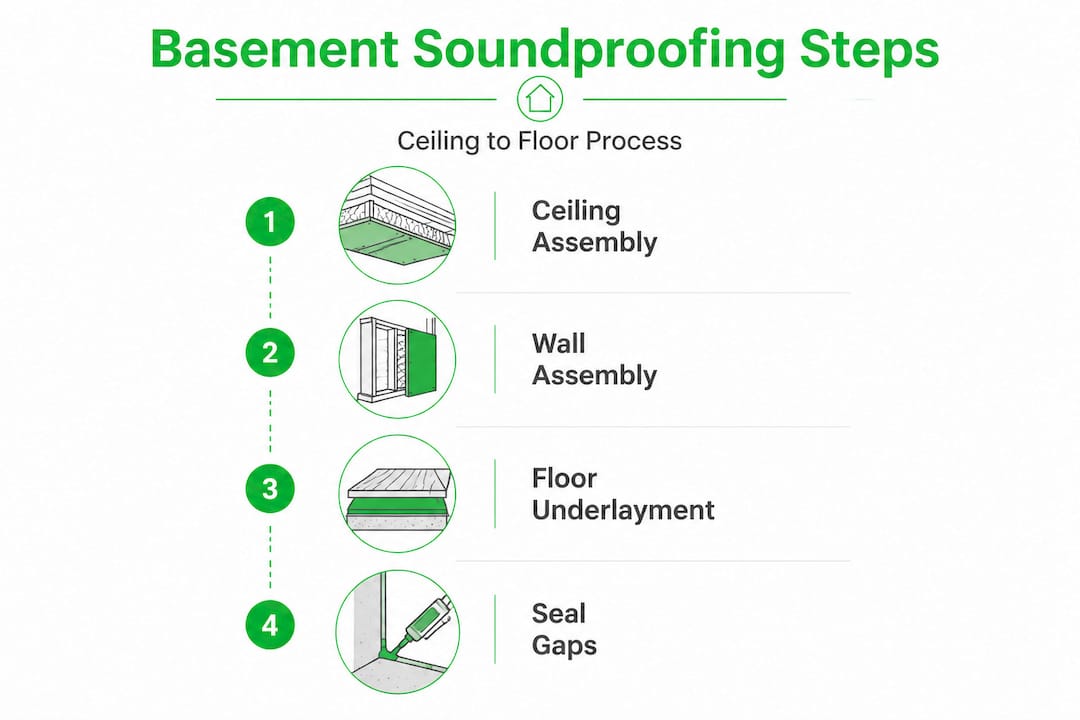
Step-by-step: Building a soundproof basement from ceiling to floor
With your prep complete, you move into the actual build. Work from ceiling to floor. This sequence is deliberate. Ceiling work is the most impactful because impact noise from footsteps above is the dominant complaint in most basements.
Step 1: The ceiling assembly
The ceiling is your primary battle. Prioritising the basement ceiling targets the main transmission path for impact noise from above. The standard luxury approach uses resilient channels or sound isolation clips, combined with double layers of 5/8-inch drywall and Green Glue damping compound between the layers. This assembly alone can improve your STC by 8 to 12 points. Every joist bay should be packed with mineral wool before drywalling.
Step 2: Wall assemblies
Walls carry both airborne sound from adjacent rooms and flanking noise that travels around your ceiling assembly. Double stud walls (two separate stud walls with an air gap) are the gold standard but eat floor space. A practical alternative for most luxury basements is a single stud wall built away from the concrete, packed with mineral wool, and finished with double drywall and Green Glue. All penetrations including electrical boxes, pipes, and HVAC ducts must be sealed with acoustic sealant products rated for sound control. Regular caulk is not adequate.
Step 3: Floor underlayment
Soundproofing underlayment under hard surfaces reduces impact noise significantly. For a luxury basement with hardwood or engineered flooring, use a premium acoustic underlayment rated at IIC (Impact Insulation Class) 65 or higher. For media rooms or home theatres, floating floor systems with neoprene or rubber isolators take performance even further by mechanically decoupling the floor from the concrete slab below.
Pro Tip: Never skip the underlayment even if you’re installing carpet. Carpet adds comfort but doesn’t provide meaningful impact noise control. The underlayment does the heavy lifting.
Explore modern basement renovation ideas to see how soundproofing integrates with luxury design choices in open-plan and entertainment-focused layouts.
Element
Method
STC contribution
Ceiling
Clips or channels, double drywall, Green Glue, mineral wool
+8 to 12 points
Walls
Decoupled stud wall, mineral wool, double drywall
+6 to 10 points
Floor
Premium underlayment or floating system with isolators
+4 to 8 points
Gaps and penetrations
Acoustic sealant, foam tape, sealed electrical boxes
+3 to 6 points
Gaps deserve separate attention. Even a 1 percent open area in a wall assembly can reduce STC performance by half. Expanding foam tape solutions are highly effective for sealing the perimeter of door frames, windows, and where drywall meets framing. For basement layout tips that preserve your square footage while still delivering full acoustic control, planning the layout early is key.
Testing and fine-tuning: Did your soundproofing actually work?
Once the dust settles and the space is finished, it’s time to verify. Many homeowners skip this step and then live with avoidable noise for years. Testing doesn’t require expensive equipment.
Practical at-home testing methods:
- Play music or a movie at normal volume from the main floor. Walk around the basement and note where sound bleeds through.
- Have someone walk normally across the floor above while you stand quietly in the basement. Note both the volume and location of impact sounds.
- Use a free smartphone decibel metre app to take baseline readings with a noise source above (80 to 90 dB), then measure the reduction in your finished basement.
- Check every wall edge, door frame, and any HVAC register for vibration or air-carried sound leaks.
Your target is an STC of 50 to 55, meaning loud voices should be muffled and a full system should reduce noise by 50 to 80 percent. If you’re not hitting that range, the most common culprits are:
- Unsealed electrical boxes or plumbing penetrations
- Doors without acoustic seals or door sweeps
- HVAC ducts carrying sound directly into the space
- Resilient channels that have been accidentally “short-circuited” by screws touching the joist directly
Any one of these can undermine an otherwise excellent assembly. Address them methodically before concluding there’s a deeper structural problem. When noise is still clearly audible after addressing the obvious fixes, professional acoustic diagnostics using calibrated equipment and blower door tests can pinpoint the remaining paths. The investment is worth it when you’ve spent significantly on finishes. A well-soundproofed basement also pays dividends when it’s time to sell. Discover how boosting basement home value connects directly to the quality of acoustic comfort you’ve built in.
What most people miss about basement soundproofing
Here’s the honest truth from years of managing high-end renovation projects across South Georgian Bay. Most soundproofing failures don’t happen because of bad materials. They happen because of compromises made during planning and execution.
The biggest trap is treating soundproofing as an add-on. A client decides mid-project, after walls are framed and electricals are roughed in, that they want a quiet space. At that point, the resilient channel system they should have had is now impossible to install properly because the electrical boxes are already flush-mounted to standard framing. Every shortcut in sequence costs more to fix later than it would have cost to do right the first time.
Budget materials compounding the problem is the second major issue. Thin drywall, standard fibreglass batts, and consumer-grade caulk sold as “acoustic” sealant are not luxury products. They will not deliver luxury results. In a premium renovation, the difference in material cost between adequate and exceptional soundproofing is often less than five percent of the total project budget. The performance difference, however, is not five percent. It’s the difference between “pretty quiet” and genuinely serene.
Humidity control is another overlooked detail. A basement that swings between 30 and 70 percent relative humidity will cause drywall compounds to flex seasonally, opening tiny gaps at seams and edges over time. This is especially relevant in Georgian Bay properties near the water, where seasonal humidity swings are significant. Pairing your soundproofing build with a dedicated whole-home dehumidification system protects your acoustic assembly for the long term.
Entertainment-focused and open-concept basements have their own challenge. The more open your layout, the more flanking paths exist for sound to travel around your assemblies. Soffits, open stairwells, and shared duct systems all create sound highways that bypass your carefully constructed walls. Planning for these routes from the very beginning of design is the only reliable way to close them. Our local basement renovation expertise reflects exactly this kind of regional knowledge, built from real projects in real Georgian Bay homes.
The homeowners who end up with truly serene spaces are the ones who planned for soundproofing at the structural stage, used the right materials without substitution, and addressed every single transmission path including the ones that aren’t obvious.
Ready to enjoy your perfect, peaceful basement?
Achieving true acoustic luxury in a basement takes more than good intentions and a few rolls of insulation. It takes sequenced planning, the right materials, and experienced hands that understand how sound actually moves through a structure.

At Mighton Construction, we’ve spent over 30 years building and finishing premium spaces across Wasaga Beach, Collingwood, and the broader South Georgian Bay region. Our team manages every detail from structural prep through to final acoustic testing, so you get the quiet, refined space you envisioned. Whether you’re planning a new build with custom luxury homes in Collingwood or ready to invest in finishing your basement the right way, we’re ready to talk through your project. Contact us for a consultation and let’s build something worth coming home to.
Frequently asked questions
How much noise can basement soundproofing actually reduce?
A fully integrated soundproofing system can reduce noise by 50 to 80 percent, muffling even loud footsteps and voices to near inaudibility in a well-executed luxury build.
What is the best insulation for basement soundproofing?
Mineral wool outperforms fibreglass for sound control, offering STC ratings of 45 to 52 compared to 39 to 44 for fibreglass, along with better moisture resistance in basement environments.
Do I need to test for radon before soundproofing my basement in 2026?
Yes, 2026 codes require radon testing in all basements before completion of soundproofing or enclosing walls, making it both a code requirement and a critical safety step.
What should I fix before insulating for soundproofing?
Always address moisture and drainage first, as damp insulation loses its effectiveness and can promote mould growth that undermines the entire assembly over time.
Does foam acoustic panelling help with soundproofing?
No, foam panels absorb internal echoes only and do not block sound from travelling through walls or ceilings, making them ineffective as a soundproofing solution.
Recommended
- How to Upgrade Basement for Resale: Boost Value Step-by-Step
- Basement Finishing: 10 Essential Steps for Success
- Complete Guide to Why Finish Your Basement
- Luxury Basement Renovations Collingwood | Award-Winning Custom Finishing — Mighton Construction
- 5 Reasons Why Basement Waterproofing Is A Must
- Step-by-step guide to basement remodeling for maximum value